Android Data Recovery
Screen Recorder: Capture Live Stream Videos on PC/Mac
-- Tuesday, July 04, 2017
Guide: Capture Live Stream Videos Easily
To capture live stream videos you like, the Screen Recorder can be a terrific choice for you to use. By using the program, you won't miss a single live streaming video as it allows you to automatically capture videos with its Task Scheduler feature.Screen Recorder app records any live streaming video from Twitch TV, BBC, CNN, and Live stream, as well as many other live video websites, whether manually or automatically. Now, please continue to read for the details.
Step 1 Install Screen Recorder on Windows/Mac
To start with the recording process, you need to firstly download and install the Screen Recorder program on your Windows PC or Macintosh. Once the installation comes to the end, please launch it.


Step 2 Sep Up Task Scheduler
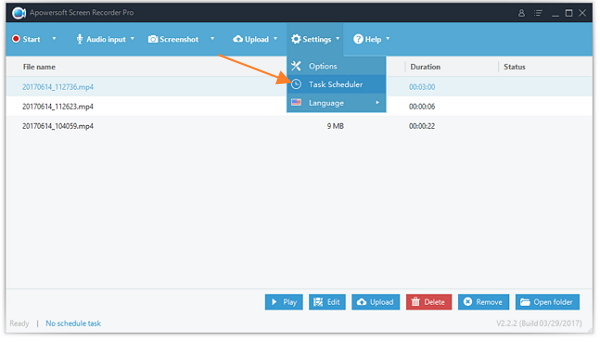
From the program, please click on the "Settings > Task Scheduler" and then you can see the interface of Task Scheduler.

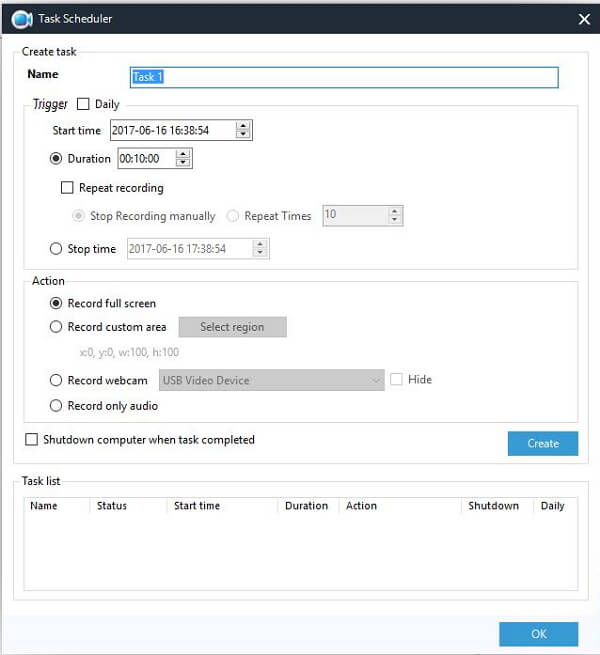
Now, name your task and then set up the trigger(start time/stop time) and action. Then click on "Create" and the recording will be recorded on time.

Step 3 Check the Result
Before you begin to create a real task, you can set up an example for testing. Check out the result and see if it would record the video correctly.
Bonus: If you are a Mac user, you can record your Mac screen with the QuickTime Player.
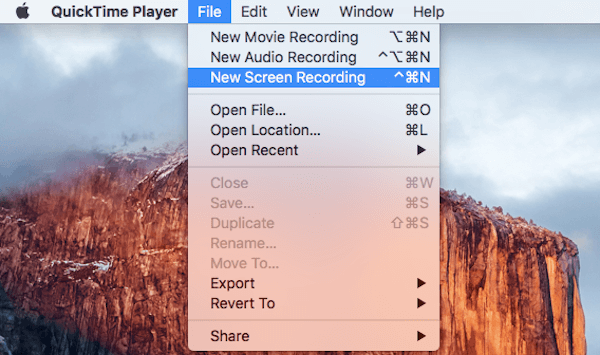
1. Launch the QuickTime Player on Mac and then navigate to "File > New Screen Recording".

2. You can choose to click to record the full screen, or click and drag to select a cropped portion of your display to record.
3. Click on the "Start Recording" and it would automatically record your Mac screen.
4. Click on the stop button in your Menu Bar or simply or press Command-Control-Escape to stop recording your screen.
Bottom Line: As you can see above, the Screen recorder can work well in both Windows and Mac system. The feature which impressed us most would be the possibility to create a task schedule for the live streaming videos. In the other hand, though you can record Mac screen and even edit the recorded video with the built-in QuickTime Player at ease, you are not supported to capture live streaming videos automatically. In this way, you are recommended to use the Screen Recorder to record any live streaming video online.
If you get any idea about this article, please simply leave us a message on the comment area below.


