Android Data Recovery
How to Transfer Videos from iPhone to Mac
-- Monday, April 27, 2015
""I have lots of videos stored on my iPhone, which takes up large space of my iPhone. I know that I have to give up some of the movies to get more space. But all of them mean a lot to me, so I am reluctant to delete any of these videos. Secondly, these videos clips come from different resources: Some of them purchased from iTunes, some of them synced from Windows, some of them shot with my camera. That's complex to transfer all these precious videos back to Mac safely with iTunes. So, to keep my movies 100% save, I won't take any risk to try iTunes. And I am now searching for a save and powerful software that I can transfer videos from iPhone to Mac with ease, no matter how much it costs!""
iPhone Transfer (Mac) is an excellent video manager for iOS device. With it, you can easily transfer the movies you want from iPhone SE/6s/6s Plus/6/6 Plus to Macbook, to iTunes or to other iDevice with just two steps. What's more, it is upgraded a lot so it supports the latest iOS device soon after new iDevices released.
Download iPhone Transfer (Mac) for your Mac and try it:


Easy Steps to Transfer Videos from iPhone to Mac
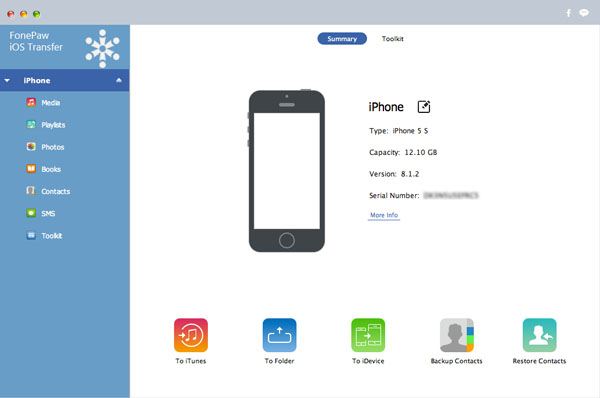
Step 1 Launch iPhone Transfer and Connect iPhone SE/6s/6After downloading and installing iPhone Transfer (Mac) on your Macbook, launch it and connect your iDevice to the computer via data line. Once have your iPhone connected, the program will start detecting your iDevice and the data shown in categories as below.
Step 2 Preview and Choose Videos
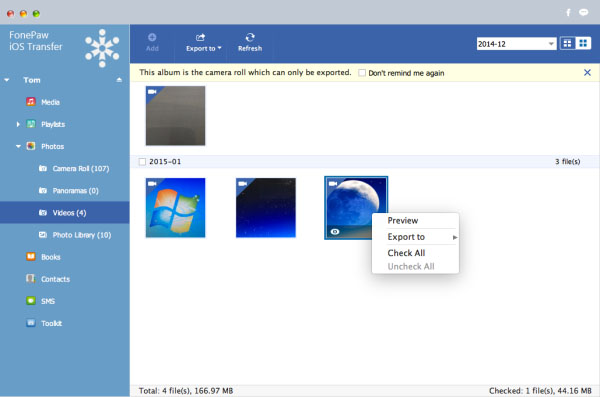
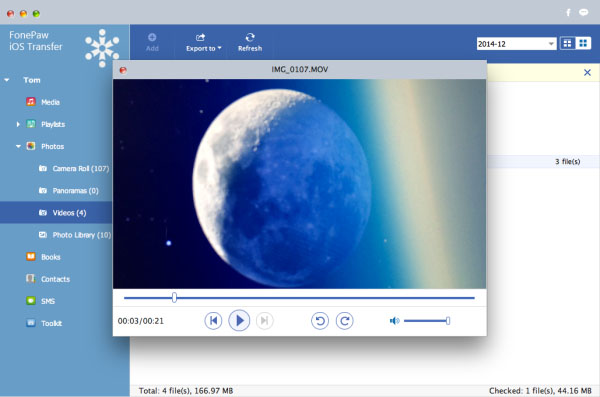
After all the videos shown in the interface, you can try preview the videos by clicking "Photos" then "Videos" on the left side before exporting them from iPhone to Mac. Right-click the video and then select "Preview". Then, the window with the video you just chose pops-up and you can play it on your Mac.
Step 3 Transfer videos from iPhone to Mac
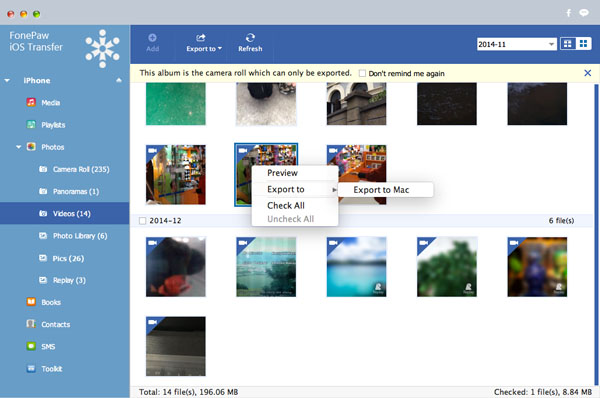
After that, it's time to export them to a certain folder on your Mac: Choose all the videos you want selectively and click "Export to" then "Export to Mac". The process may cost some time because the size of videos are little large.
And if you want to transfer other videos like music videos, movies, TV shows, iTunes U or podcast, you can click "Media" from the left column and then choose the videos you want as you wish.
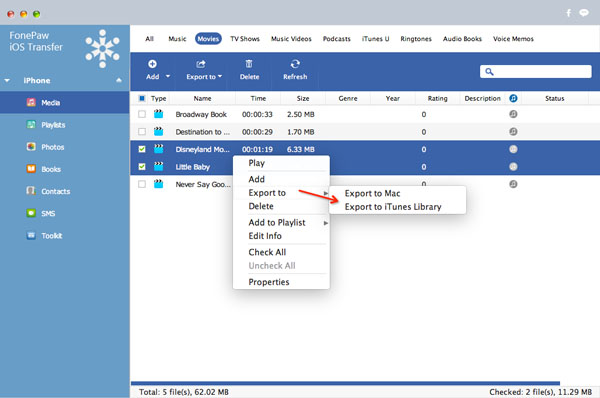
Do you think it is very helpful? Not yet, it has more functions: It allows you to transfer videos from computer to iPhone as well. In a word, with iPhone Transfer (Mac), you can manage your iOS data between iPhone SE/6s/6, iPad Pro/Air 2/mini 4, iPod, PC/Mac and iTunes with simple clicks. It supports various data type like contacts, text messages, books, videos, music, photos, iTunes U, podcast, TV shows, and so on. So you can of course transfer music from iPhone to Mac with this outstanding software. Don't hesitate to let us know if you have any questions while using the tool, please.


