Android Data Recovery
Ultimate Guide to Use Apowersoft Android Recorder for Screen Recording
-- Wednesday, July 05, 2017
Full Guide to Record Android Screen
Step 1 Preparation for Recording AndroidBefore you start to record your Android screen, you should firstly prepare for the following items:
1. Confirm that your Android has connected the same Wi-Fi with Windows PC or Mac
2. Require Android 5 or later versions
3. Download the Apowersoft Android Recorder program on your Windows PC or Mac by clicking the correct button below.


Step 2 Launch the Apowersoft Android Recorder
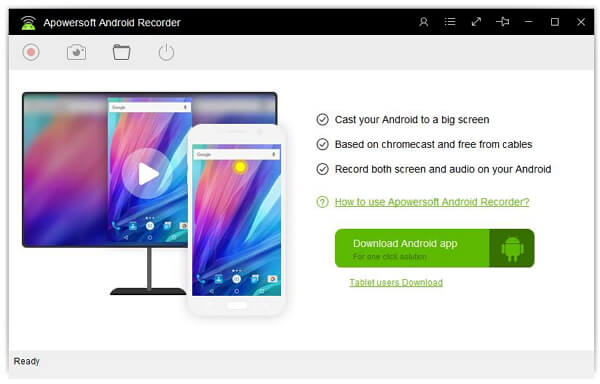
After you download and install the Apowersoft Android Recorder program on your computer, please launch it! For some of the users who may set up a firewall for PC, you can see a pop-up window to ask for the privilege of accessing. Please select the two items on the interface and then click on the "Allow access" button.
Step 3 Connect Your Android to Computer and Start to Mirror
To connect your Android to computer, you can choose one of the following three ways:
1. Connect via built-in Chromecast
2. Use Google Home for Connection
3. Download Apowersoft Screen Recorder App for Connection
Actually, when talking about the connection between smartphone and computer, you may come up with the way by using USB cable. However, it doesn't work with this case here and you need to select one the three methods for the connection. Now, let's see how they work in details.
1. Connect via built-in Chromecast
To connect your device to computer via the Google's Chromecast, your Android device needs to be equipped with built-in Chromecast. Normally, not all the Android devices would get the built-in cast screen feature. But the Nexus phone would always equips with it.
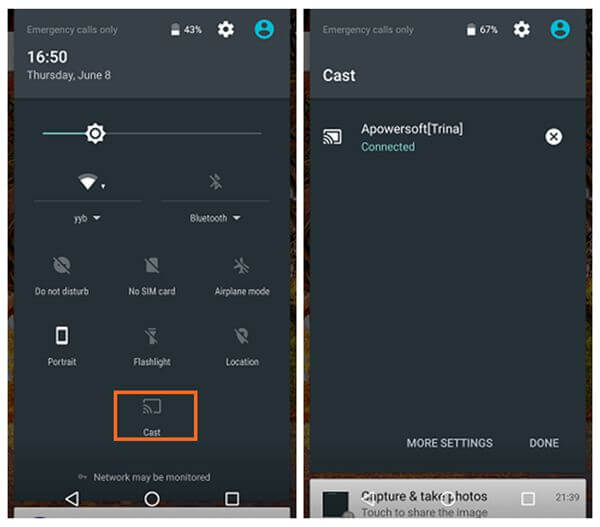
On the Android, please slide down your phone screen and tap on the "Cast" icon on the interface. Now, you can see "Apowersoft[your computer name]" icon on the screen. Please continue to tap on it and your Android screen would be connected on computer.
2. Use Google Home for Connection
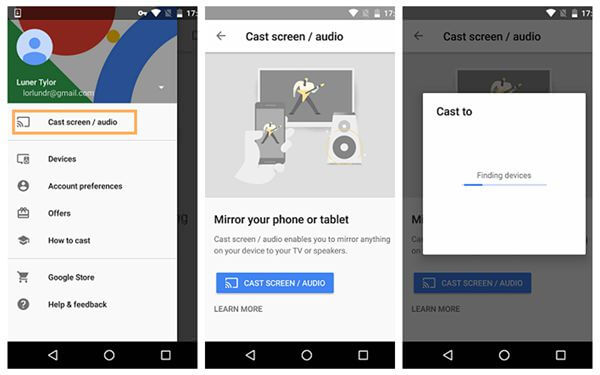
To connect your Android to computer, please firstly download Google Home app on your device from Google Play. Then run it and tap on the more icon on upper left corner of the interface. After that, choose the "Cast screen/audio" option and tap on the icon with your computer name (available device). Then you can see your Android has been mirrored on computer successfully.
3. Download Apowersoft Screen Recorder App for Connection
If you fail to use the above two ways to connect your Android to computer, using the third-party recording tool - Apowersoft Screen Recorder can be a good choice.
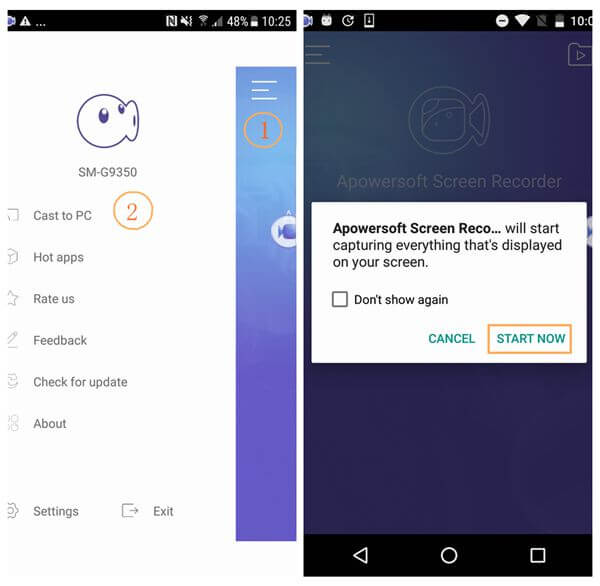
Now, please download and install Apowersoft Screen Recorder app from Google Play Store on your Android. Launch the app and tap on the menu button on the top left corner. On the interface, please choose "Cast to PC" option and then "Cast" button to start connection. After that, all the activities on mobile screen can be streamed to your computer.
Step 4 Record Your Android Phone Easily
If your Android is successfully connected to computer, you can see your Android screen would be mirrored or displayed on your Windows/Mac via the Android recorder app. Please click on the red record button on the upper left corner to start recording. When you would like to stop or finish it, all you need to do is to click on the stop button and the recording video would be exported to your computer.
Tips:
1. With the screen recorder for Android, you can also capture a screen shot of your Android by simply clicking on the camera-like icon, which would be saved as PNG file on computer.
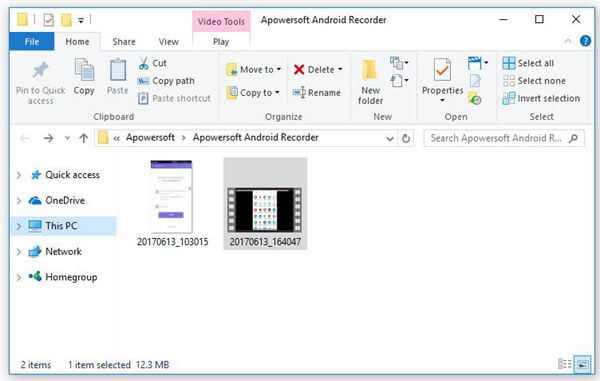
2. Every time you record your Android or take a screen shot with the app, the exported files would be automatically saved on your computer. And you don't even have to navigate to the location manually as the folder with your exported files would pop up itself.
3. You can also try to record your Android by utilizing the Apowersoft Screen Recorder app and the recording video would be directly saved on your Android.
Step 5 Disconnect Android
After your finish recording, please simply click on the power-like button on the top pane to disconnect Android to computer.
If you have any question about this guide or get any idea to share, please let us know by leaving a message on the comment area below.


